Forms and Fields
There may be more than one form associated with a document, and you might be granted access to the other forms. You typically have access to several read-only forms, which groups fields by type.
Forms
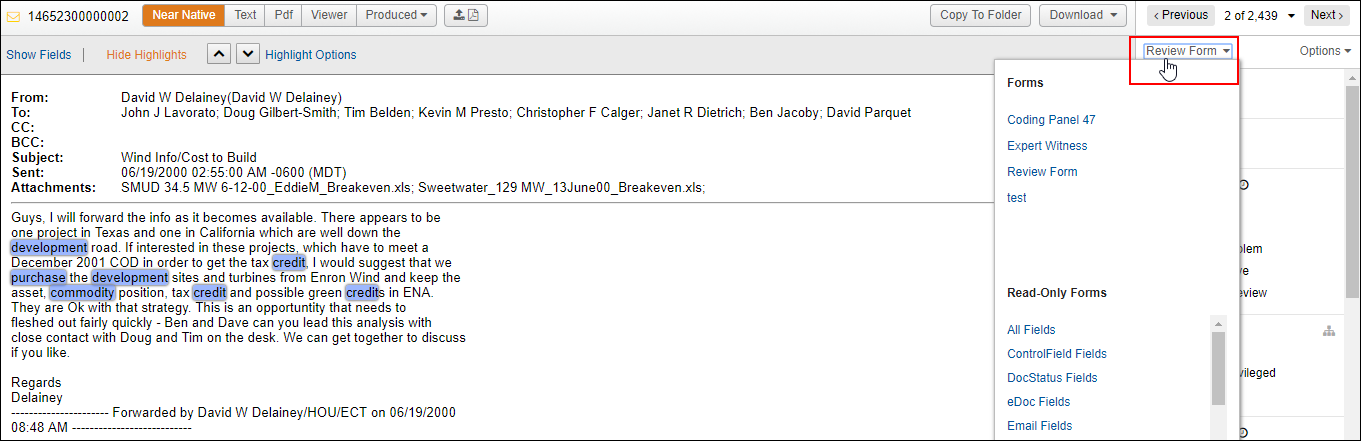
To see the forms you have rights to (editable forms and read only), expand the Forms menu.
Change to a different form by clicking it in the list.
Read-Only fields hold the metadata related to your document. If you select to display a Read-Only (non-editable) form, you can select the Hide Empty Fields checkbox to show only those populated with information
![]()
Metadata information can also be viewed by clicking Show Fields in the document pane (in the Text view or the Near Native view).
Forms can be set on the right or left side of your document. By default, you will see it on the left until you change it. Expand the Options menu, and select the Doc Form to Left or Right link.
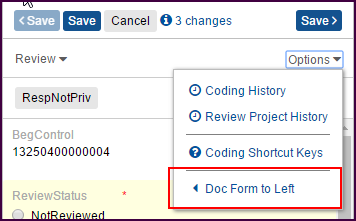
Select the Coding History link to view all the changes to the document fields.
At the Field History tab, you can see the changes to the document’s fielded data, who made the change, and the value or values that were changed. Redaction, conversion and other document changes will also be displayed.
The Review Project History displays the stage a document was changed in and the number of related or associated documents coded.

Fields
You will make coding changes to editable fields located in a specific review form. Fields can have properties and rules assigned to them. Fields with a faint red background and an asterisk (*) are required fields. You cannot save the record until you apply values to required fields.
Insight forms may contain several different editable field types:
Text fields allow you to add or edit text. These work like standard text boxes and may be limited to short entries or allow longer entries. Type in the box to include information.
Fields may allow you to choose one value from a list of values by selecting an option button (radio button).
Another field that allows you to choose only one value is the drop-down menu. Expand the menu and highlight your value.
You may also have fields which allow you to select more than one value. Checkbox fields display all the value choices in the form, and you can select one or several.
The multi-value lookup field also allows you to make multiple choices. It is typically used when there are several choices, and listing them all as checkboxes would create a very long form. In this way, if you need to make selections, you can find them by:
Clicking the Search button (magnifying glass).
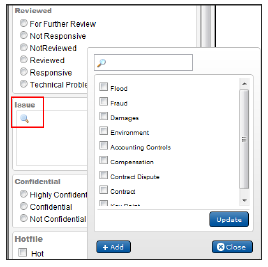
Find your values and select them using the checkboxes. You can search for a value if this list is large. Type part or all of the word into the box above the list, and click the Search button. If the value isn’t available, you may have the ability to add it. If the Add button is available at the bottom of the table, click it. Type your value into the text box and click the Add button beneath the text box. This allows you to input a value not previously included inn the list.
Back in the list, find your new value and select it using the checkbox. You can click Close to close the lookup table without adding any values.
When you’ve chosen all the appropriate values you need, click Update. Your values will now populate the field.
Some fields, such as date fields, may require you to enter information in a particular format. Insight adheres to the International Standards for Organization (ISO)-developed International date format of YYYY-MM-DD. You may receive an error when you enter fielded information in the wrong format and try to save the document.
The Delete (X) button is available in a field to clear the field of all input. The button appears when you point to a field.
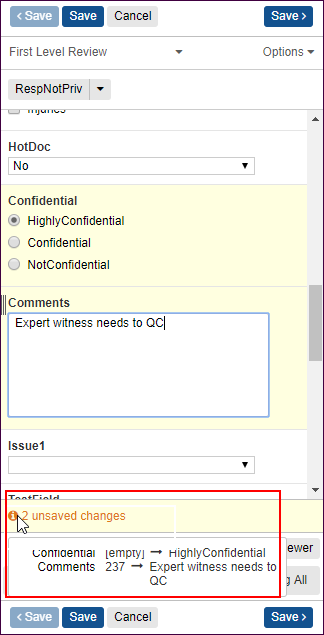
When you change a field, it is shaded in yellow to reflect that you’ve made a change during this session. For a quick look at all your field changes in the form, click the Information button, located at the bottom of the form. The number reflects the number of fields you have changed.