Document Interface
Document review takes place within the Insight document interface, known as the Document Detail page. To open a record, click anywhere in the row of your document while in the Results page.
Documents on your site may be uploaded in their native file format, meaning that Word and Excel records, for example, are uploaded in their original applications. Insight provides viewers to quickly and accurately display the record contents without having to open it within the original application. This provides a rendition of an Excel spreadsheet, for example, without having to download it and open it within the Excel software.
The buttons above the document content open the different viewers available for displaying the document. The File Type icon is displayed at the top left of the record. Depending upon your permissions, you may be able to convert the document to PDF if it does not have a PDF version already, copy the document to a folder, download the original and replace the PDF.
Viewer
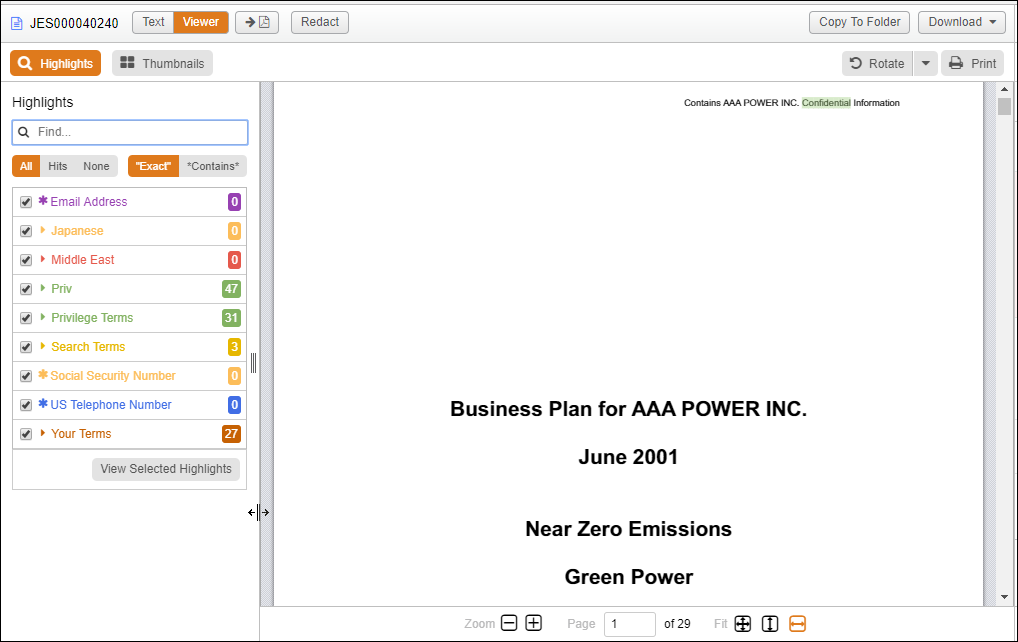
Your site will have our most versatile document display enabled, and this is simply called the Viewer. Clicking this button displays documents with most of the original formatting maintained from the native file as shown in the example below.
Viewer Highlights
The Viewer allows you to turn on and off specific highlighting categories and even individual highlights by selecting or clearing the checkboxes in the Highlights panel. Click the Highlights button to open or close the entire panel. Highlighting includes:
Pattern-Based Terms: These are also terms set up by the administrator, but rather than the exact terms located using Static Terms, these terms are set up to match a pattern. If a set of numbers matches a certain pattern, as with a tax identification number, social security number or phone number, for example, the Viewer highlights occurrences of them.
Static Terms: Your administrator may want certain terms, such as specific names, to be highlighted. Your administrator can organize terms by sets. The color of sets are also selected by your administrator.
Search Terms: If you brought back your documents via a search, those terms are automatically highlighted in your documents (this is also true in the Text view). These terms are always in yellow.
Your Terms: These are terms only you can see. To find a phrase or term within the document, type it in the Highlights Find box and click Enter on your keyboard. This is not case sensitive. So if you enter "California" or "california," for example, it highlights this word. Search for a precise term by selecting Exact. Another option for searching within your document is to use Contains. This is, in essence, a wildcard search within the document. Perhaps you need to find the word californium in the document but are unsure of the spelling. Type as much as you know into the box, select Contains and then click the Enter key. Your Terms are listed until you remove them using the Delete (trash can) button. They follow you as you page through your documents and even if you log out and log back in.
Note: It is important to remember that terms may show up only in fielded information when you find a document via a search. For example, if you run an AnyText search, which includes all the body and all the fields, you may not see the hit in the Viewer Highlights panel. Switch to the Text display and select to view the highlights.
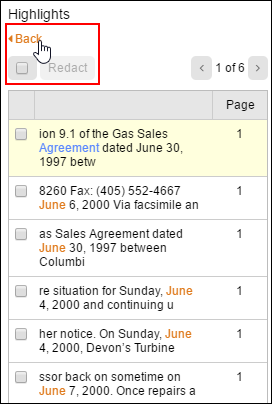
View Selected
When hits are found in the Highlights panel, use View Selected to see snippets of selected highlights in context. This makes it easier to determine where important information resides within the document – it is especially useful when viewing large documents. Jump from highlight to highlight using the Arrow buttons or click the snippet to jump to that highlight. The Back button takes you back to the Highlights panel.
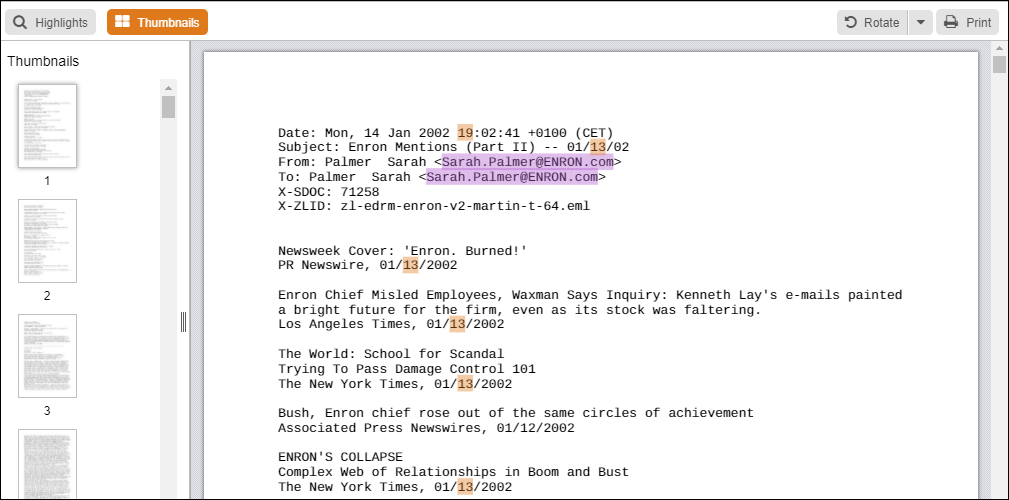
Thumbnails and Navigation
Within the Insight Viewer, click Thumbnails to quickly navigate to specific pages. You can also rotate or fit the document to the page and zoom in and out.
Viewer Display of Excel Records
When Excel spreadsheets are displayed using our Viewer, hidden rows and columns, along with embedded objects and charts are shown automatically.

To view any formulas associated with the record's cells, please download and open the workbook in Excel.
Word and PowerPoint Track Changes and Comments
Track Changes and Comments in Word documents and PowerPoint presentations are displayed using our Viewer. Hidden slides are not available. Download the file, and open it in its native application if you believe hidden slides may be part of the original presentation.
Text View
The Text view is another option that is available for viewing your documents in Insight. The Text view shows hit highlighting (Search Terms) and static highlighting (Key Terms), which are designated by your site administrator to be highlighted each time these words appear in documents on your site.
To display highlights:
Click the Show Highlights link. Here you can select to show terms by the contains or the exact option. For example, if the hit is the word program and the contains option is selected, the letters p-r-o-g-r-a-m are highlighted within the words program, programs, programmable, etc. Selecting exact ensures only the word program is highlighted within the record.
To turn on or off the types of highlights or specific highlights, use the checkboxes.
Click the Up or Down Arrow buttons next to the Highlight Options link to scroll to the next or previous highlighted term as shown below:
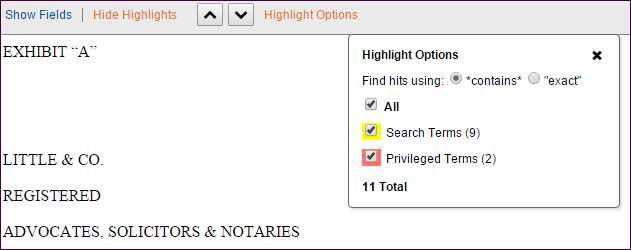
As with other Insight features, Highlights Options remains open until you close it.
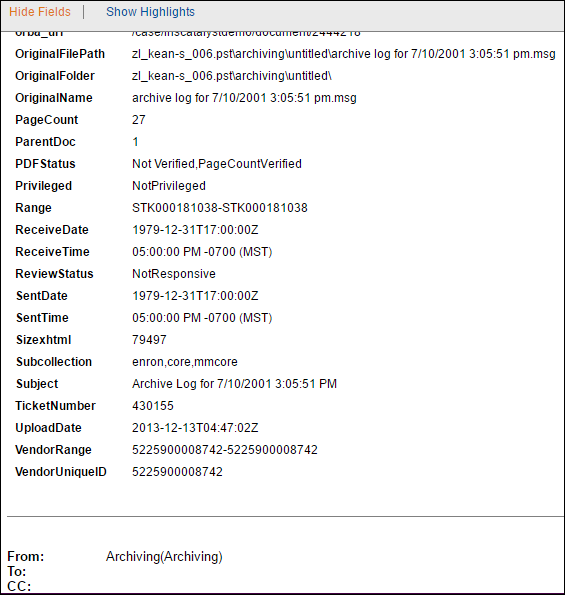
Show Fields
The Text view also gives you the option to click Show Fields to display all of the fields that are populated with data in the record. The fielded information is above the content. You will see Show Fields and Highlights Options in other views as well.
The Text view displays the following information about documents uploaded as native files:
Word Files: The latest changes to the document before it was uploaded to your site.
PowerPoint Files: Speaker's Notes, the text from hidden slides and the text from embedded files in PowerPoint programs.
Excel Files: The text within comments, embedded files and the text in any hidden rows and columns.
Other Viewers
There are other viewers available in Insight. They may or may not be turned on for your site. These are outlined below.
Excel Spreadsheets
Our Excel viewer displays spreadsheet files that are natively .xls and .xlsx files, showing 100 rows of data per page. To see more rows, simply use the Page Control Navigation buttons at the top of the page. If the spreadsheet has more than one worksheet, you can switch among worksheets by clicking the tabs at the bottom. Our standard Excel viewer displays:
All hidden rows and columns
Embedded charts (access these by clicking the Charts menu at the top of the spreadsheet.)
To view any formulas associated with the file, click the Download button, and open it in Excel.
PDFs
If the PDF viewer is enabled on your site, when you open an Insight record that was uploaded as a PDF or a PDF version was converted to a PDF, the PDF button is available.
If you use Google Chrome, PDF records are displayed with the default Chrome PDF Viewer. To access the Chrome Viewer menu, point in the document.
These buttons allow you to enlarge, minimize, zoom in or out, save a copy of the document to your computer and print the document (send it to your local or network printer). You can also right-click in the document to save, print and rotate the document. (Insight also provides a quick Print button in some views of a record.)
TIFFs
Insight supports single- and multi-page TIFFs. Within your site, the viewer may be named TIFF or Image. Use the page navigation buttons to change pages in the document.
Annotations
If you have the appropriate permissions, you can place annotations on a TIFF image.
In the Image tab with the scanned TIFF record visible, place your mouse pointer in the document image. The pointer becomes a plus sign.
Click in the image, and holding down your mouse key, drag the pointer over the area you’d like to place your annotation and release the mouse key. This places the annotation box in the record and opens the Annotation Editor dialog box.
Enter any text you would like to appear in the box (you can also leave this blank), and then click OK. Click Delete to remove the annotation.
To edit or remove a single annotation, click the Annotation Editor button in the top-left of the annotation box. This reopens the Annotation Editor (see above image), allowing you to delete or add/edit the text.
Note: The system automatically saves a page of annotations when you move to a different page using the page navigation buttons.
The Annotations menu allows you to save or change the entire annotated version.
You can rotate the image and increase or decrease the magnification.
The Toggle Annotation Opacity button allows you to switch between viewing opaque annotations that will not show you the underlying information or the transparent view, which allows you to see the annotations but view the underlying information.
Click the Toggle Annotation Visibility to view the record without the annotations showing. This doesn’t remove the annotations; it makes them invisible. Click the button again to display the annotations.
If the image has been OCR’d, buttons are available to view the image with text in the Document frame. These include viewing just the image or just the text, as well as viewing the image and text side-by-side or the image and text with the image above the text.
Once you’ve added your annotations to the record, you can also use the Save button to save the annotated version of the record.
The Delete button removes all the annotations in the page you are currently viewing (it doesn’t remove annotations from other pages).

