Redacting Documents
If your site uses the our most current Viewer with enhanced searching and automated redaction, follow the steps directly below at Automated Redaction. If your site does not use the Viewer and consequently uses the original redaction method, instructions are here.
Automated Redaction
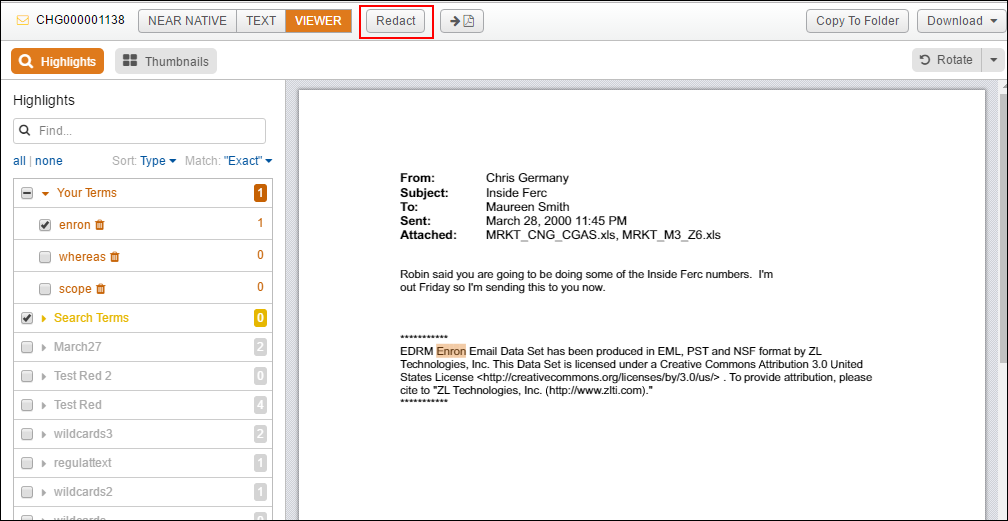
When using the Viewer to display native (MS Word, emails, PowerPoints, for example) and PDF records, use the Highlights panel to find words and phrases and redact them appropriately.
If a redaction already exists (you can still edit it), the Redaction button displays HasRedactions. A redacted version is saved whenever you close out or move to the next document, and at this point, the Redact button for that document changes to green.
You do not have to display the content in the Viewer to begin redacting. When you click the Redact button, the system automatically displays the Viewer.
When you are actively redacting the button remains orange and includes HasRedactions in the button name.
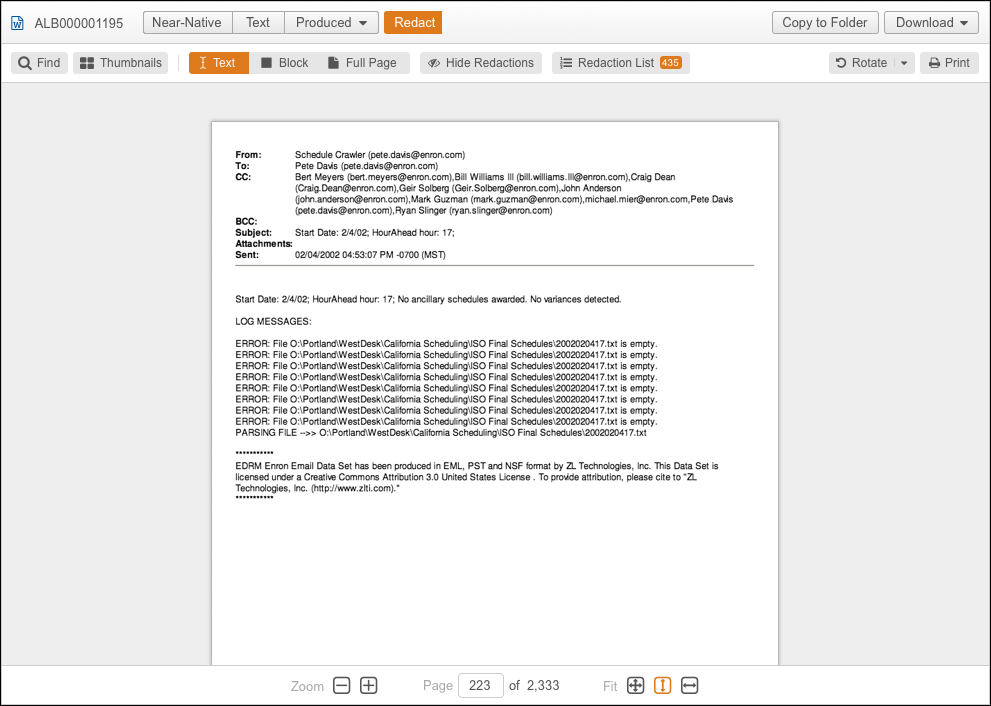
Text Redaction
Use Text Redaction for redacting words or individual lines of text in a document. This is also how you find occurrences of the same word or phase and redact them off the document in bulk.
Click the Text button to redact text in the document and drag your mouse over the words you want to redact.
To find a word or phrase in the document to redact, hover over the redaction you made and you will see the Redaction Reason list, a Find button and a Remove button.
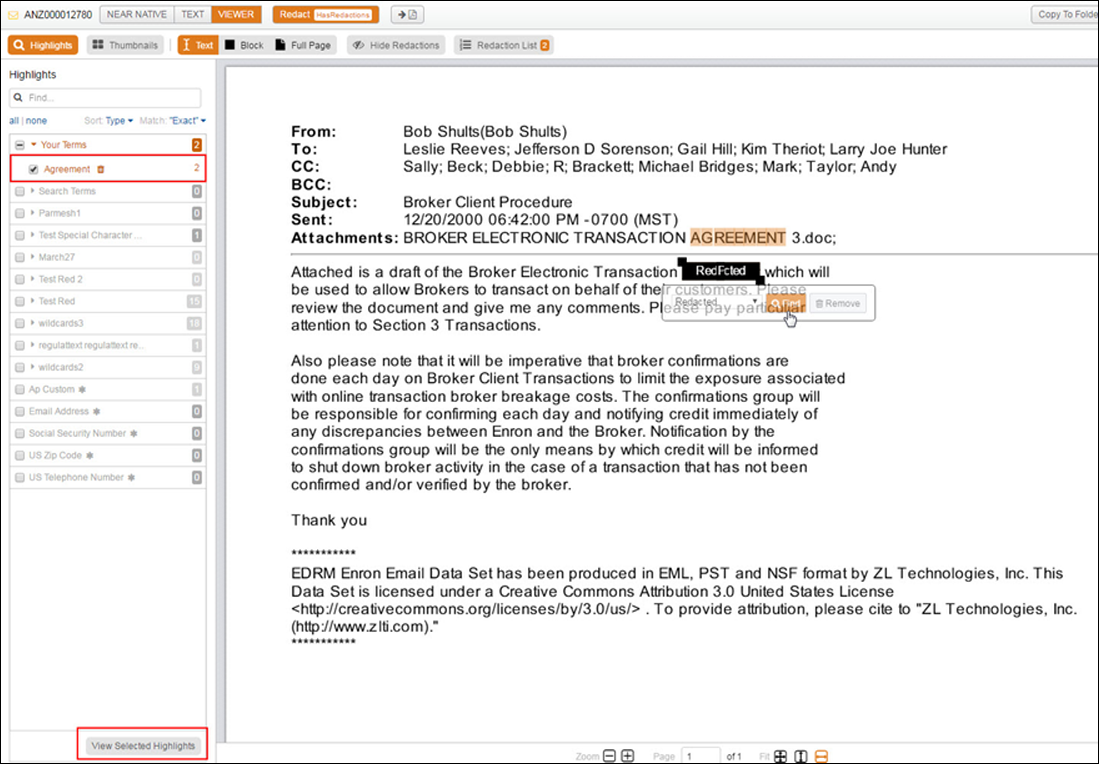
Select the Find button to push the term(s) you redacted into Your Terms in the Highlights panel to be a part of your document content search terms.
Click View Selected Highlights at the bottom of the Highlights panel.
Using the checkboxes, select the snippets showing the word elsewhere in the document. Select the Redaction Reason and then Redact. This will automatically redact all selected instances of the word in the document with the reason you selected.
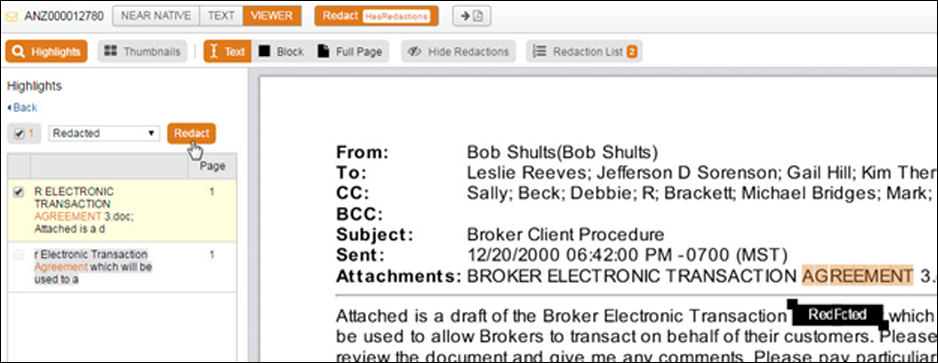
Use this automated redaction method for words that appear in your highlights too. You don’t have to redact and find those words since the Highlight panel already recognizes them. Just use the checkboxes, choose your Redaction Reason and Redact. And, open the Redactions Quick Guide for more information.
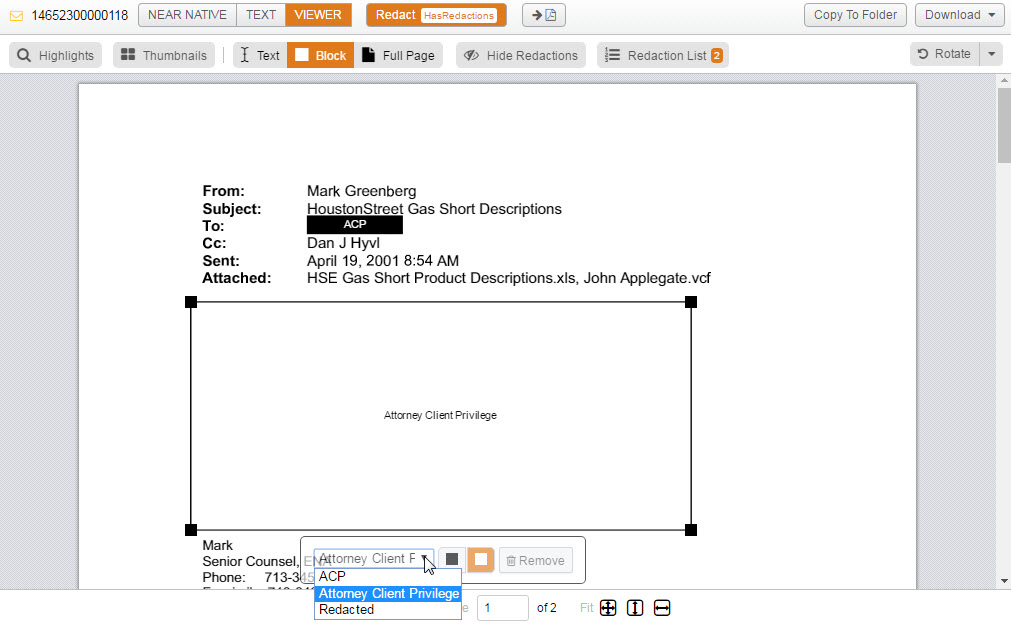
Block Redaction
To apply a simple rectangle with or without a reason given, click Block and then click in your record and apply the Redaction box. Use this when you don't expect several occurrences in the same document. As with Text Redaction, you can hover over the redaction to see the Redaction Reason list, the ability to change the color of the box from black to white and the Remove button.
Full Page Redaction
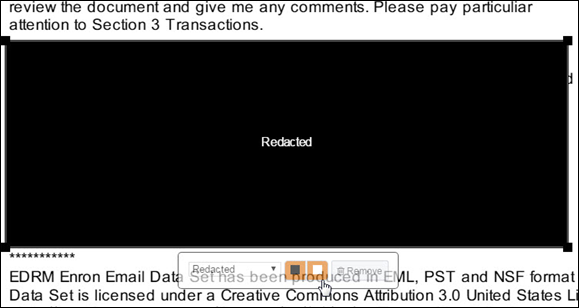
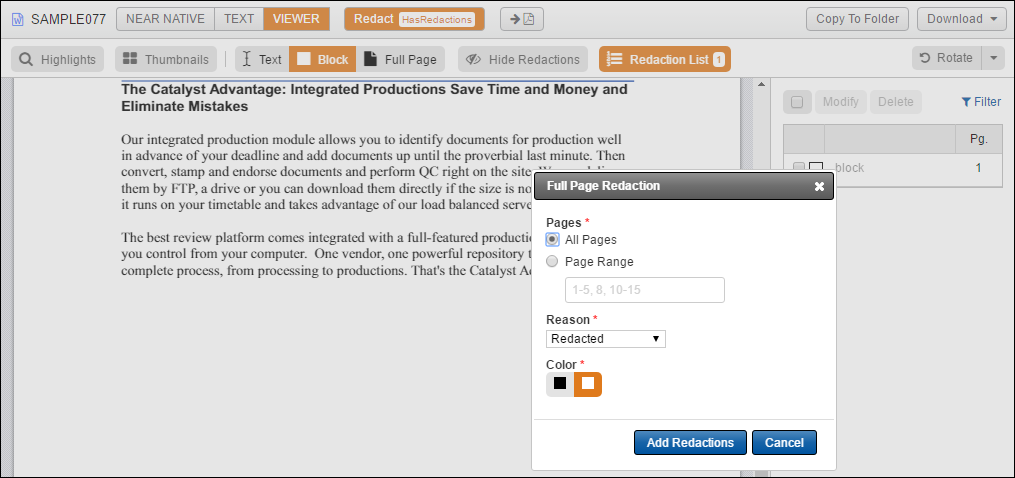
Fully Redact a page or a range of pages, by selecting the Full Page button. Select the Reason (all fields are required) and the Color.
Click the Add Redaction button to redact the full page or pages you've entered.
Redaction List (Editing and Deleting Redactions)
Select the Redaction List to show all redactions made on a document.
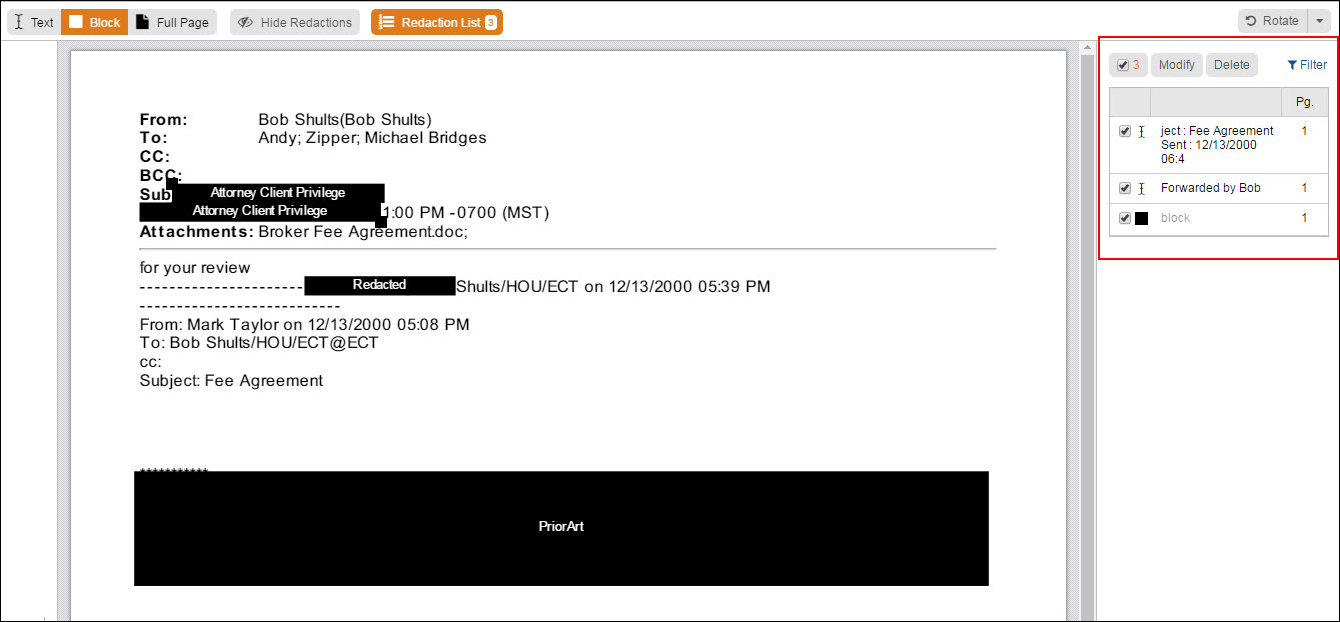
You can filter the redactions by using the checkboxes. Select the Redaction Reason(s) and then select a Type to see the reasons of that type. For example, you can choose the Attorney Client Privileged and the ACP Redaction Types but select the Block type to see only those that were of that type of redaction.
In the Redaction List, use the checkboxes to select redactions you want to modify or delete. Use the appropriate button to take those actions.
Modifying the Reason will change the text on the redaction box to the new Redaction Reason you select.
Selecting Delete will remove the selected redactions from the document.
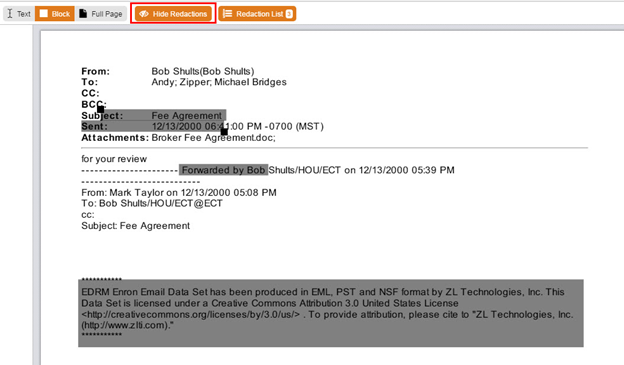
Hide Redactions
If you want to QC redactions, and view them in a transparency, select the Hide Redactions button.
Redact Documents on Sites without Viewer Enabled
Insight provides web-based redaction for sites not using our Viewer. Redaction is a user permission so if you do not see the Redact button, you do not have permission to redact. Talk to your administrator if you need redaction permissions.
The system converts files to PDF; then, from the PDF, an image file is created for the redaction to take place. After the redaction is saved, the image file is then converted back into a PDF. Insight’s redaction system does not redact the PDF itself because redactions can be removed if the PDF file is redacted.
To start the redaction process, open the document you would like to redact. If you do not have a PDF version of the document, first click the Convert to PDF button.
Click the Redact button to begin redacting.
Redaction sets are used to group the redacted documents into sets, so that when it is time to produce documents, a particular set of redacted documents is pulled. More than one set is used typically when documents on a site need to be redacted differently for production to different parties. Your administrator will create appropriate redactions sets for your site and inform you about their use.
To create or continue a redacted version, click the Redact button. In the Create/Continue Redaction dialog box, select whether to start with the original document, or if a document already has a saved redacted version, you can make changes to this version. Additionally, if the Redaction module was closed prior to saving the redaction, you can select to continue with the redaction that is in progress.
Next, select the Redaction Set to store the document.
Use the controls at the top of the screen to rotate the page, which is useful for scanned images that may be rotated, or to zoom in or out—increase or decrease the size of the document.
The redaction button controls are at the top left of the document. These buttons allow you to place the appropriate redaction box within the document image. Your administrator will have set up a number of custom redaction controls with specific messages (e.g., Privileged, Work Product). Your site may have a Blank redaction button. This button will redact but leave no redaction message, only a box with a border. Additionally, you may have the option of using a blank redaction button that does not have borders, so that the redacted copy doesn’t show areas that have been redacted using this button. (This can be useful when you want to redact an old Bates number that appears on the document.)
Click one of the redaction buttons and then draw a box around the text or image you need to redact by holding down your mouse button and dragging the pointer over the area you need to hide in the document.
You can change the size of the redaction box by dragging the corners or the sides with your pointer.
As you move from one page to the next on a multi-page document, the system will save the changes. You do not have to click the Save button or the Save Draft button as you move from page to page. Click Safe Draft if you want to manually save your work and have only partially completed a page.
Once you have finished redacting the document, click Finalize. This signals the system to convert the redacted version into a secure PDF.
If you do not finalize the redaction by clicking Finalize, a redacted version will not be pulled, as the system does not considered an un-finalized saved draft a redacted version. The system does, however, notify the production manager of the drafts.
It is best practice to finalize each time you make a redacted version. You can go back and edit a finalized version, but make sure you remember to finalize it again.
After you have input the redaction boxes, you can select the Save button (disc) to save your redactions. This is saving a draft and works the same as the Save Draft button. The system does not convert your redaction back to PDF unless you click the Finalize button. When redacted versions of a record are pulled for printing or production, only finalized documents are considered redacted versions. Always click Finalize when you have completed your redactions.
You can delete a redaction box by expanding the menu at the top left of the redaction box and selecting Delete from the options.
Redaction buttons may be set up so that you are able to edit the text of the redaction, the color of the text, box and border, the alignment of the text, and the font. If these options are available, click the menu at the top left of the redaction box and make your changes in the Redaction dialog box. Redacted versions of documents that contain colored fonts or images will retain the colors in the redacted version.

