Results Page
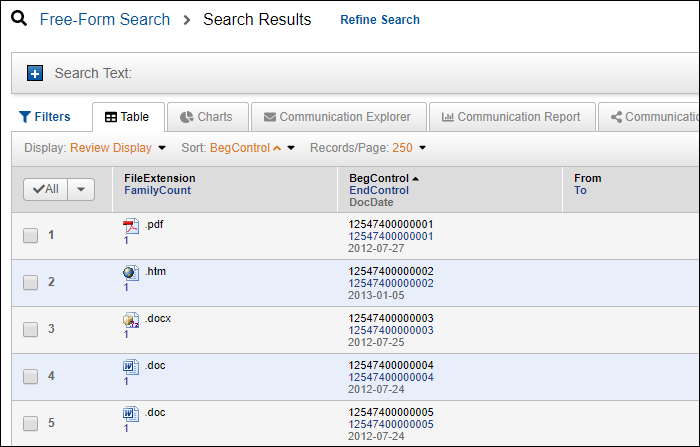
When you run a search or open a folder, your documents are returned in the Results page. Insight offers several ways to access your documents and view information about those documents. In the Results page, the Table view is the default view and displays your documents in pages of rows. To open a document, click anywhere in its row.
Use the navigation buttons, above and to the right of the rows to navigate among the pages.
Use the Table view buttons, located above and to the left of the rows to:
● Change the number of documents per page
● Sort the results
● Edit the display
Change the Number of Documents per Page
Click Records/Page and change the number from 10 documents in each Results page up to 250 per page.
At Sort, you can select up to three fields to sort the order of your documents. You can also click any sortable field that serves as a column header to sort on the fly.
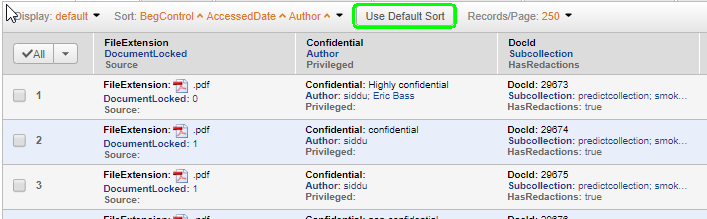
Note: If you are using a public display, and you change the document Sorting, you will notice a "Use Default Sort" button appear which will allow you to easily revert back to the Public Display's Sorting configuration as pictured in the screenshot below.
Edit the Display
If
your Role has the EditDisplay permission,
you can create and edit custom displays for your own unique needs. You
can use Save as button ( ) on the Display drop-down
to clone a display from the displays that are Public, and tailor it to
meet your needs.
) on the Display drop-down
to clone a display from the displays that are Public, and tailor it to
meet your needs.
Note: Only administrators can edit default displays, since these are site wide, but you can clone either a default or a custom public display with the EditDisplay permission.
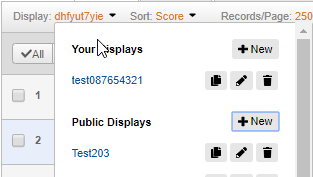
Expand the Display menu and click the +New button, enter a name in the Display Name field and click the Create Display button.
To start adding columns, click Create a new column. Add up to three fields to each column. If you want to see the icon of the native file, be sure to have a column that includes the File Extension field.
Continue adding columns to your display by clicking the Column menu button and selecting Insert 1 Left or Insert 1 Right. (You can always rearrange columns at any point.)

