Printing and Downloading Documents
If you have permissions to do so, you can create a downloadable file of selected documents from your Results page. The Insight Print feature allows you to create a PDF file or a Zip file of the documents you select. If you choose to make a PDF file, you can tailor it for printing to include separator sheets between each document with fielded data, bookmarks, headers, footers, and watermarks. If you choose to zip the records into a folder, you can select to use the native version of the record or the HTML preview, which allows for quick opening and doesn’t require the native application to view the contents of the record.
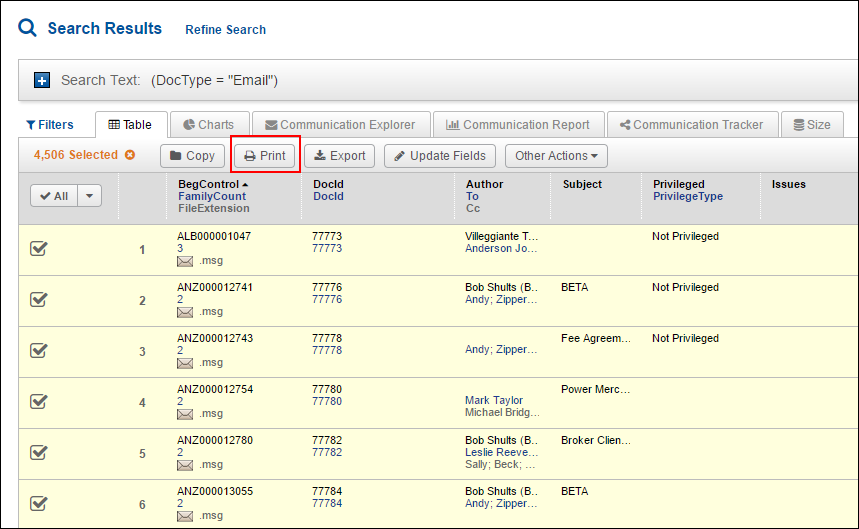
Select your documents using the check boxes, and this opens the Actions menu.
Next, click Print to set up your Print Job.

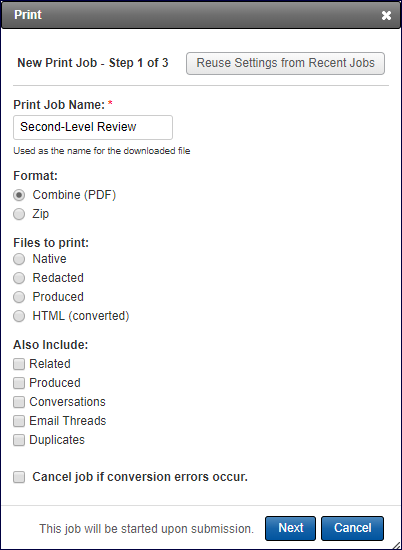
Enter a name for your print job. (You will be prompted if the name goes above the character limit or contains unacceptable characters).

Next, select the either the Combine (PDF) or Zip Format.
Combine (PDF), combines all your selected documents into one PDF file. If you choose the Combine (PDF) option and your selected documents are not already in PDF format, costs may be incurred on a per-page basis. Consult your site administrator for more information.
A Zip folder of each of your selected documents.
Select the Files to Print: Native, Redacted, Produced, HTML (converted).
If you want the entire print job to fail if any document fails to convert to PDF, select the Cancel job if conversion error occurs check box. Instead of creating a PDF with some missing documents, the entire job will fail.
Select the Reuse Settings from Recent Jobs button if you want to simply apply your last settings to this print job. This is not available if you have not run prior jobs.
Click Next.
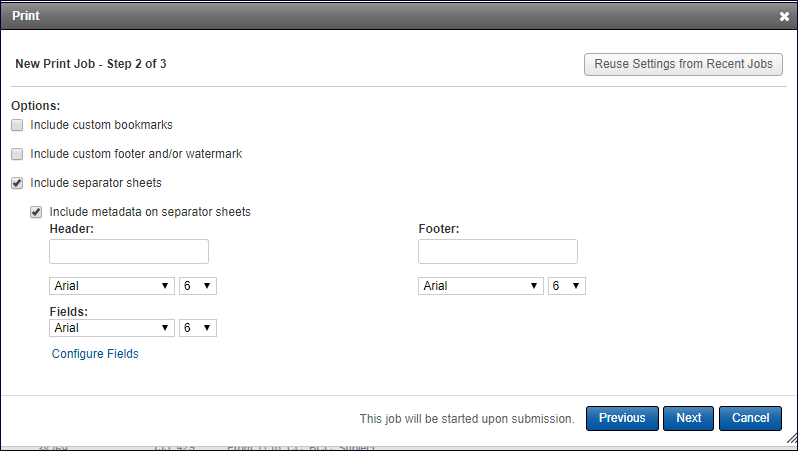
At Step 2 of the New Print Job, include options for the properties of your new PDF.

NOTE: Select Unicode font if Chinese, Japanese or Korean text will be used in the Header, Footer or metadata on the separator sheets.
Once it is set up to your satisfaction, clicking Next proceeds to the Summary Page. You can select to be notified when it is ready. Then, click the Submit button. You will be able to locate the Print Job in the Jobs module.